20150515

Reflect Echo Three


For one reason or another I haven't knit another Reflect Echo since I introduced it back in 2012. In part it had to do with not having very much of this black merino to work with, but I also knew that the second would be for me (the first one sold rather quickly). Since it was slated as a personal project, it just got backburnered, and ultimately forgotten. I'd pass over this yarn from time to time while digging out other yarns for shop production, and now it's been three years.


I've done a few things differently this time. Firstly I sized up the needles from US2 (2.75 mm) on the original to a US3 (3.25 mm). Aside from making the fabric more fulled, it made the physical act of knitting much easier on the hands. Mainly I just wanted it to be more stretchy, and the four strand structure fluffed out pretty well in that regard.

Another change I made was to the narrow banding. In the original it was a simple band of seed stitch. Due to the angularity of the transitions, the seed stitch bands leaned slightly. Since I found them to be a bit too pronounced anyway, I decided to try alternating purl columns with them in an attempt to keep it all leveled. The result is a more subtle banding that doesn't lean as extremely as the initial version. You can visually tell that there is something different going on in there, but it's not as obvious as the original. I like that. I especially like how the purl stitches align to make thin horizontal lines in these areas.

Here's a shot of the inside. Note the verticality of the seed bands.

I've been steadily incorporating this into various designs over the past year or so, and now the technique I've been referring to as the "full trefoil" has been incorporated into Reflect Echo. What this means is that the columns that comprise the crown decreases at the top are carried throughout the knitting process from the very beginning at the brim. In fact, these decrease columns are plotted in the very first cast on row. This creates some mathematical discrepancies that I won't get into, but visually what this translates to is columns that span from brim to crown, and like in all my hats, they are in sets of three. I like to think of them as support columns because they typically carry the pattern stitches found in the central body of the work. In a lot of ways, these columns unify my work as a whole.


20150430

Try New Things


As some of you may know already, I live in San Jose, California, and we have a plastic bag ban here. I won't get into why I think that's awesome, but it is. But one thing I noticed is how un-awesome the reusable bags I've collected are. They're terrible. And what's more: the growing collection of them is rivaling the previous collection of plastic bags they replaced. When it comes down to it, I only really need a few reusable bags. I never buy more than a few items when I go to the grocery store because I prefer to go more often. It's an opportunity to ride my bike more often, and I like riding my bike.

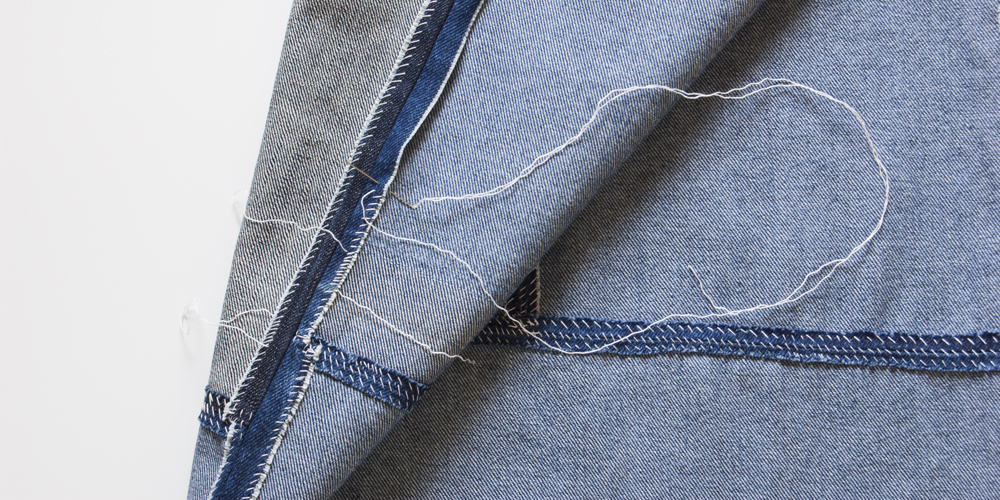
This tote bag is about as simple as it gets. And believe me when I say that I demonstrated much restraint in over-embellishing it with excessive ideas. With this project, I wanted to try a few things, but not to the point where I over thought the design of something so simple. As with my previous denim patchwork project (my apron), I use a running stitch to patch right sides together, then a whip stitch to seal edges, and reinforce the seams. However, in that project I was joining three strips of fabric together, where each whip stitch seam was parallel to each other. This time, I wanted to see how this technique would translate to the perpendicularity of intersecting seams. Would it be too thick? Will there be structural weakness? Can I even do this correctly?


Okay, well that last question doesn't even apply. I just do what works, and I needed to do this in order to find out. In addition to the intersecting seams, there was this issue with the bottom of the bag. I knew I wanted it to look and fold like a paper bag, but didn't really know how it would come together until I actually did it. It wasn't hard, I just looked at how a brown paper bag is constructed, and went from there.

Ironing was something I did a lot of throughout the construction of this bag, not just for the whip stitch seams, but also to get the bottom to fold the way I wanted. And when I say 'fold,' I refer to not just the sewing construction, and reinforcement. When the bag is empty, I want it to fold down, much like a paper bag does. So in order to maintain the folds, I whip stitched them into place.


I added the small loop tabs on the edges of the bag for various reasons. Mainly, I wanted to be able to clip them onto the belt loops of my jeans, but they can also be used to reduce the size of the opening, or to secure long, protruding things like flowers or baguettes. Because of this project, I feel more confident with patchwork. It's only the second patchwork project I've done. It's liberating. Now I feel better about chucking some of those reusable bags into the recycling bin.

The denim I used was from two pairs of jeans, each with their own photo essay if you'd like to see them getting recycled, step by step. The lighter blue was recycled from a gigantic pair of Kikwear raver jeans, the darker ones are from Old Navy. The thread was split from a multi-strand yarn recycled from a Façonnable men’s sweater.


20150320

Light Beats


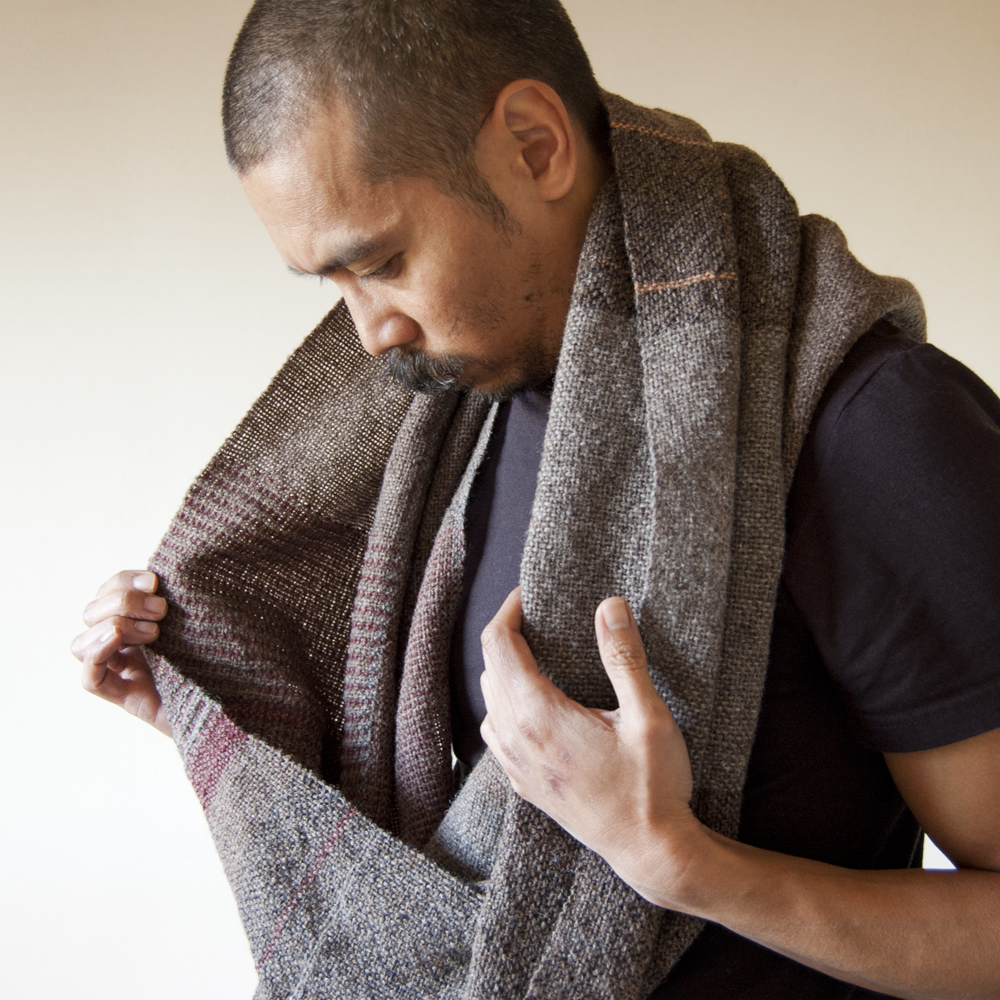
It's been three weeks since I finished this piece, but weaving is still so new to me that I've been reluctant to model the final piece. After it was done, I kept it within reach so that I can wear it every now and then. In hindsight, the reluctance was irrational. I thought that the delicate openness would somehow distort into a tangled mess, or that it would somehow crumple like a vampire lit by sunlight, or tear apart like wet paper. That's how I feel about the things I make sometimes.


Yet the structure of this piece has remained as it was after cut from the loom and washed. The varying density of light beats and high tension have remained fixed in their respective sections. I'm guessing that this is due to the yarn structure. The blue is a lace weight cotton comprised of 60% cotton, 29% nylon, and 11% wool. That synthetic content added weighted drape to the original sweater. It may have contributed to it's elasticity as a warp yarn, but that's just a guess.

Adjacent sections of varying openness will likely ease themselves into place as the piece is worn, but then they may not. I suppose I waited to post about this piece for that reason as well. I wanted to let it break itself in, open up. Let it become part of my life.


Here are the yarns used in this project: Blue, Gray Weft, and Gray Selvedge.

20150202

Delete Charlie


Sometimes when I start a project, I'll blurt out my idea just to get it out of my head, and into fruition. Sometimes it's spot on in one try, and other times I have to kill the first idea and try again. That's how the creative process works. In order to create a strong body of work, you have to learn to kill your babies, specifically the weak ones. But doing the work, making that first attempt at creating what you know might die is a necessary part of the process.

So the first idea was to knit three narrow bands of garter stitch, and then whip stitch them all together. This is still a pretty solid direction, but after working on it for months, I realized how much I hated the monotony. This first version of this project was the only knitting project I had going for a while, despite the fact that I needed to be knitting hats for my Etsy shop. I was calling it "Fragments" at the time, stupid name, really.

During this time, I was also learning how to weave on a rigid heddle loom that I purchased recently. I was torn. Do I jump into a full-blown weaving project so soon after having learned the most elementary basics of plain weave? Or do I continue to bang out weaving samples parroted from Jane Patrick's book? So boredom with my first idea, and an itch to weave a twelve foot warp lead to what this project turned out to be.


And what it turned out to be is an iteration of my stash-busting series, Delete. Being the third, it is designated Delete Charlie. If you're curious, here are Delete Alpha and Bravo. The twelve foot warp I just mentioned barely diminished, shrinking only six inches to a completed length of 11.5 feet (350.5 cm). The width relaxed down to about 11 in (28 cm).

I don't remember where I mentioned this, but I don't like little tiny scarves. I don't see the point. By tiny, I mean short. This is a very subjective term, I realize, but to me the term 'short scarf' refers to anything that is under five feet (152 cm) or so. I want to drown in it. If I neglect to wrap it around me enough times, I want to be penalized by having it scoop under my feet, and trip me. But this, of course is not that type of long scarf. It could have been, but it's not.

Since this is a circular scarf, the winding around has already been taken care of. I got the idea for this peculiar spiral construction from a bag I saw on SriThreads. I'm intrigued by diagonal geometry in general, and this bag has popped into my head (and my Pinterest feed) on a few occasions. The technique is pretty straight-forward, but the tricky part was determining a reasonable width for the resulting cylinder. In this case, the circumference is about 55 inches (140 cm). I achieved this by modifying the angle to a length that was half of that. It ended up being about 28 inches (71 cm) which is slightly longer to account for some shrinkage.


As far as the seaming goes, I attached selvedge loops to one another as if to introduce a new warp yarn. This created some interesting discrepancies where selvedges of alternated colors met stripe sections along the spiral seam. Because of the slight differences in yarn sizes, there were differing weft heights being joined together. This resulted in portions that looked like deflated balloons, or under-stuffed pillows. I remedied this with little armies of running stitches. It's reminiscent of English smocking, and Japanese sashiko, and the visual texture it created really brings the beauty of plain weave up (quite literally, I suppose) to another level.


I look back on the knitted thing that this piece could have been, and it's so boring in comparison, so ugly. That first idea had to die in order for this one to live. Being creative means having the ability to generate so many ideas that killing some of them is only natural. Additionally, it would be quite arrogant to presume that every idea is good enough to keep. Coming up with bad ideas is just as important as coming up with the good ones. It's all part of the process.


Here are the yarns I used: Brown, Grey, Black/Bronze, Red, and a very brief appearance of Orange.

20150106

Shear Echo Four


I've been mentioning it here and there over the years, and the time has finally come. This is the last of this 100% lamb's wool. I have enough for two hats, and it's finally gone. You might remember me mentioning how I found two of the same sweater which never happens. This effectively doubled this yarn lot. So over the past few years, this yarn has appeared in more hats I've knit than any other yarn. I'll need to count how many there are one of these days (I probably won't).


So here we are: Shear Echo Four. In case you missed it, here are Echos Zero, One, Two, and Three. All the parallelogram structures are there, and the columns that set the foundation for the crown decreases, the mid-row transition breaks, and the yaadda yadda. All there.

The Shear Series has proven to be the most diverse of the three that I've been exploring. I've experimented with these parallelogram compositions a lot. It's interesting to note that the Shear Series is the middle weight yarn of the three. The Divide Series is worsted weight, knit on US7(4.50mm) needles, and Reflect is lace weight multi-strand, worked typically on US2(2.75mm). Shear finds a middle way between the two, usually ending up on US4(3.50mm). So it's logical that my mind finds a way to play with this series. I don't have to commit to the unrelenting row totals of Reflect, or rely on the low resolution of Divide's worsted weights.

In hindsight, I can't believe how prolific I've been with this work. I thought I'd be sick of this by now. I'm thankful that so many of you appreciate it. You guys are rad.

Etsy Shop Listing